Relation Graph
Visualize all entity relationships in your work as an interactive network graph, with graph view, list view, and timeline mode.
What Is the Relation Graph
When writing long-form fiction, the relationships between characters — mentorships, rivalries, romances — along with alliances and hierarchies between organizations, can become incredibly complex. As the cast and factions grow, it becomes impossible to keep track of "who is related to whom and how" by memory alone.
The Relation Graph presents all relationships between entities in your work as a visual network — each entity is a node, and relationships are lines connecting them. You can see the full picture of your character web at a glance.
How to Access
Click the "Relation Graph" tab in the tab bar at the bottom of the editor to open the panel.
Nodes and Edges
Nodes
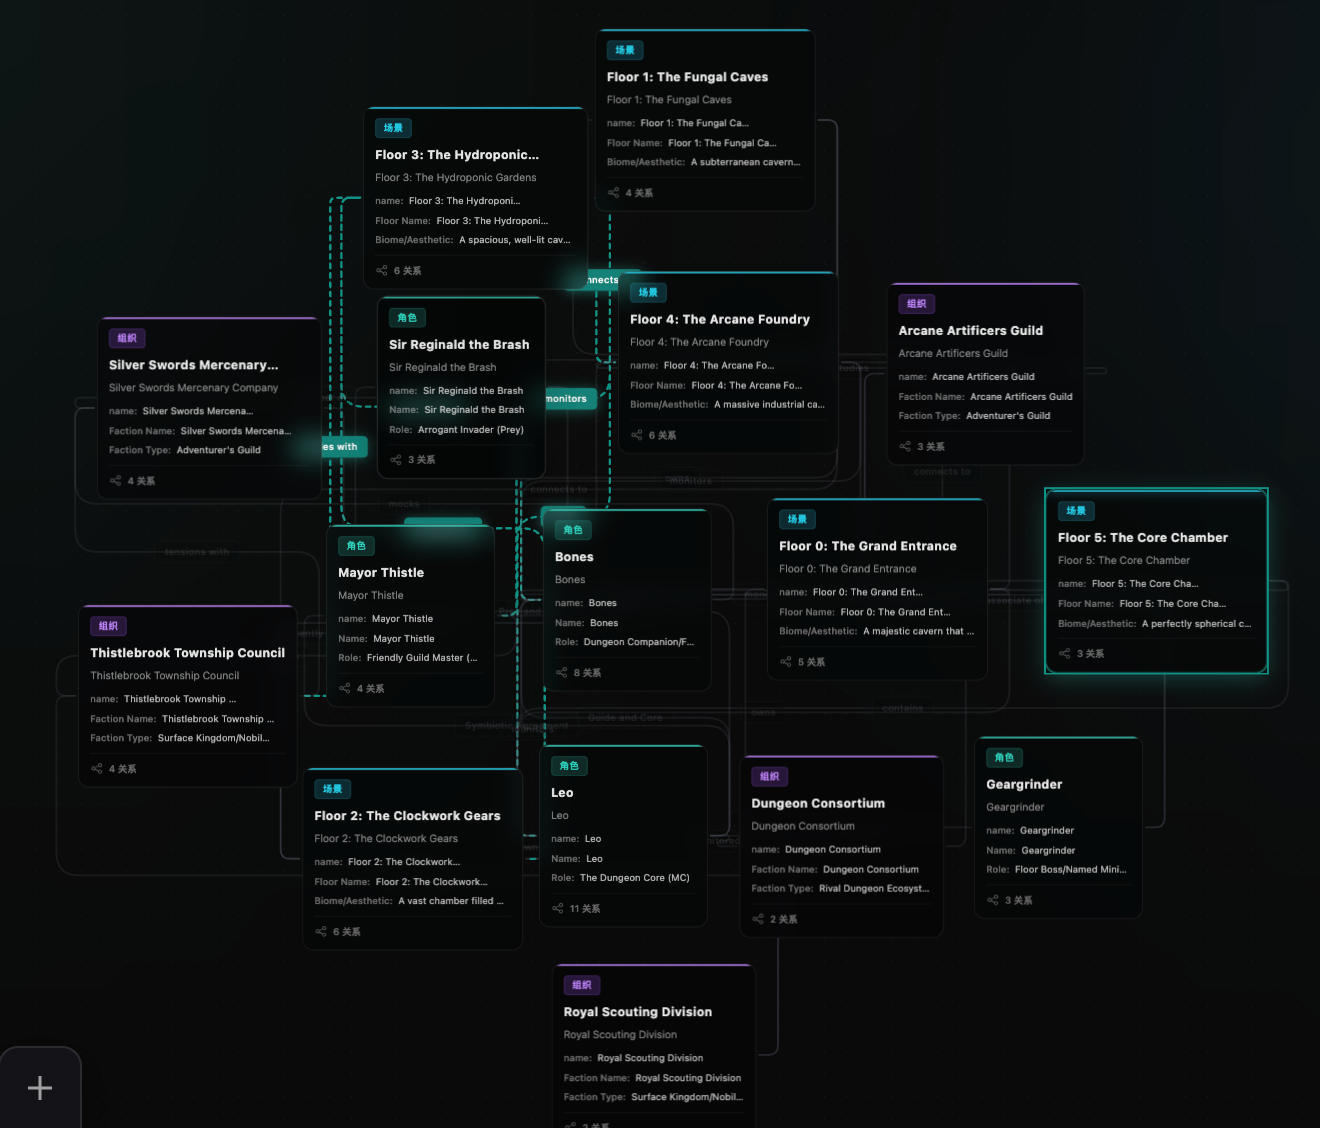
Each node in the graph represents an entity (character, organization, scene, prop, etc.). Nodes are displayed as cards showing:
- Entity name
- Type label (color-coded)
- Brief description (automatically extracted from the module)
- Relationship count (how many relationships this entity has)
Different entity types are distinguished by color:
| Entity Type | Color |
|---|---|
| Character | Teal |
| Scene | Cyan |
| Prop | Amber |
| Organization | Purple |
| Generic Entity | Gray |
Edges
Lines connecting two nodes represent relationships. A capsule-shaped label in the middle of each line displays the relationship name (e.g., "Master-Student", "Rivals", "Lovers").
When you click a node, all edges connected to it are highlighted while others fade out, helping you quickly focus on a specific character's relationship network.
View Modes
The Relation Graph offers two viewing modes, switchable at the top of the panel:
Graph View
Displays relationships as a network diagram, providing an intuitive overview of the overall structure. Supported interactions:
- Zoom: Mouse scroll wheel to zoom in/out
- Pan: Hold left mouse button and drag the canvas
- Move Nodes: Drag individual nodes to adjust positions
- View Relationship Details: Click an edge to see a popup with description and strength
- Highlight Connections: Click a node to highlight all its relationships; click again to deselect
The system uses a force-directed layout algorithm to automatically arrange nodes — closely related entities are placed nearer to each other.
List View
Displays all relationships as a text list, grouped by entity. Each relationship shows "Entity A → Relationship Type → Entity B". Ideal for quickly browsing and searching when there are many relationships.
Search and Filter
Type keywords (entity names or relationship types) in the search box at the top of the panel. The graph filters in real time, showing only matching relationships. The panel footer displays the current filtered count.
Timeline Mode
Once you have used the "Extract Relations" feature on at least one chapter, a "Timeline Mode" toggle will appear at the top of the panel. Enable it to use a slider to select a chapter point, viewing the relationship state at different stages of your story.
For example: selecting "Chapter 5" shows only relationships that have appeared up to Chapter 5; dragging the slider to "Chapter 10" gradually reveals newly formed relationships. This lets you clearly see how character relationships evolve as the plot progresses.
Relationship Properties
Each relationship contains the following information:
| Property | Description |
|---|---|
| Relationship Name | The type, such as "Master-Student", "Lovers", "Rivals", etc. |
| Description | Supplementary notes about the relationship |
| Strength | Level 1-5, indicating how close the relationship is |
| Associated Chapter | Which chapter this relationship first appears in |
The system provides several preset relationship types to choose from: Stranger, Friend, Best Friend, Enemy, Lover, Spouse, Master, Disciple, Ally, Rival, Owns, Belongs To, Leads, Controls, and more. You can also define any custom relationship name.
Important: Only one relationship is kept between the same pair of entities. If two characters' relationship changes (e.g., from "Friends" to "Enemies"), you should update the existing relationship rather than creating a new one, so the timeline mode can correctly track the evolution.
Ways to Create Relationships
AI Auto-Extraction
This is the most efficient method. In the chapter editor toolbar, click the "Extract Relations" button:
- AI analyzes the current chapter text and automatically identifies relationships between entities
- Extracted results are displayed in the AI assistant, showing both entities, relationship type, and description for each
- AI marks which are new relationships and which are changes to existing ones
- Check the relationships you want to keep, then click "Write to Graph" to batch-add them
AI Agent Operations
In Agent mode, you can manage relationships using natural language:
- "Set the relationship between Alice and Bob as mentor-student"
- "Update Alice and Charlie's relationship to rivals, strength 5"
- "Delete the relationship between Alice and Bob"
AI will automatically invoke the corresponding create, update, or delete operations.
Manual Addition
In the module editing interface, switch to the "Relations" tab to manually add relationships for the current entity, selecting the target entity and relationship type.
Tips
- Extract as You Write: After finishing each chapter, use "Extract Relations" to let AI auto-update the graph, saving you manual maintenance
- Leverage the Timeline: Use timeline mode to review relationship changes and check whether character relationship development makes sense
- Use with Dynamic Info: The Relation Graph works together with Dynamic Info to fully track relationship changes and state transitions
- AI Writing Reference: AI references the Relation Graph when continuing your story, ensuring it won't write contradictions like "characters who are enemies suddenly cooperating closely"